-白底-small100-200x78.jpg)
Planetary imaging, in simple words, is takes images of a planet and captures its details, including surface details(cloud bands or mountains) and peripheral details(rings or moons).
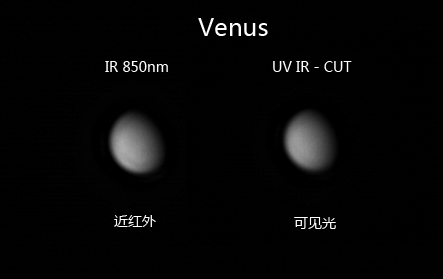
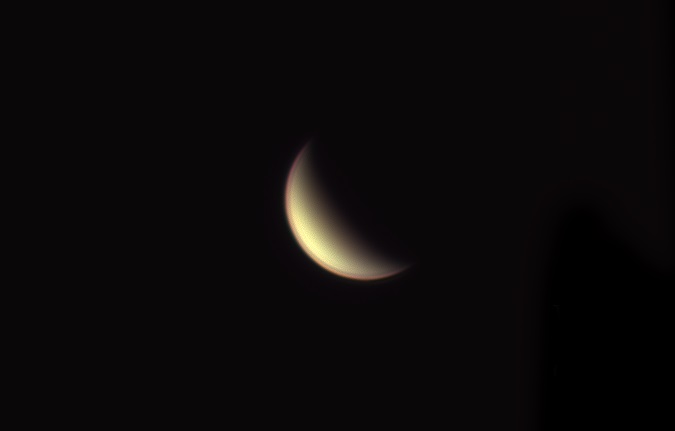
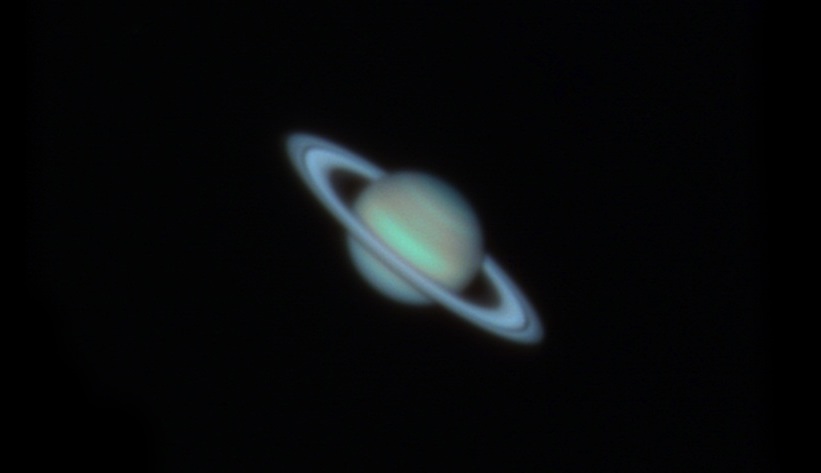
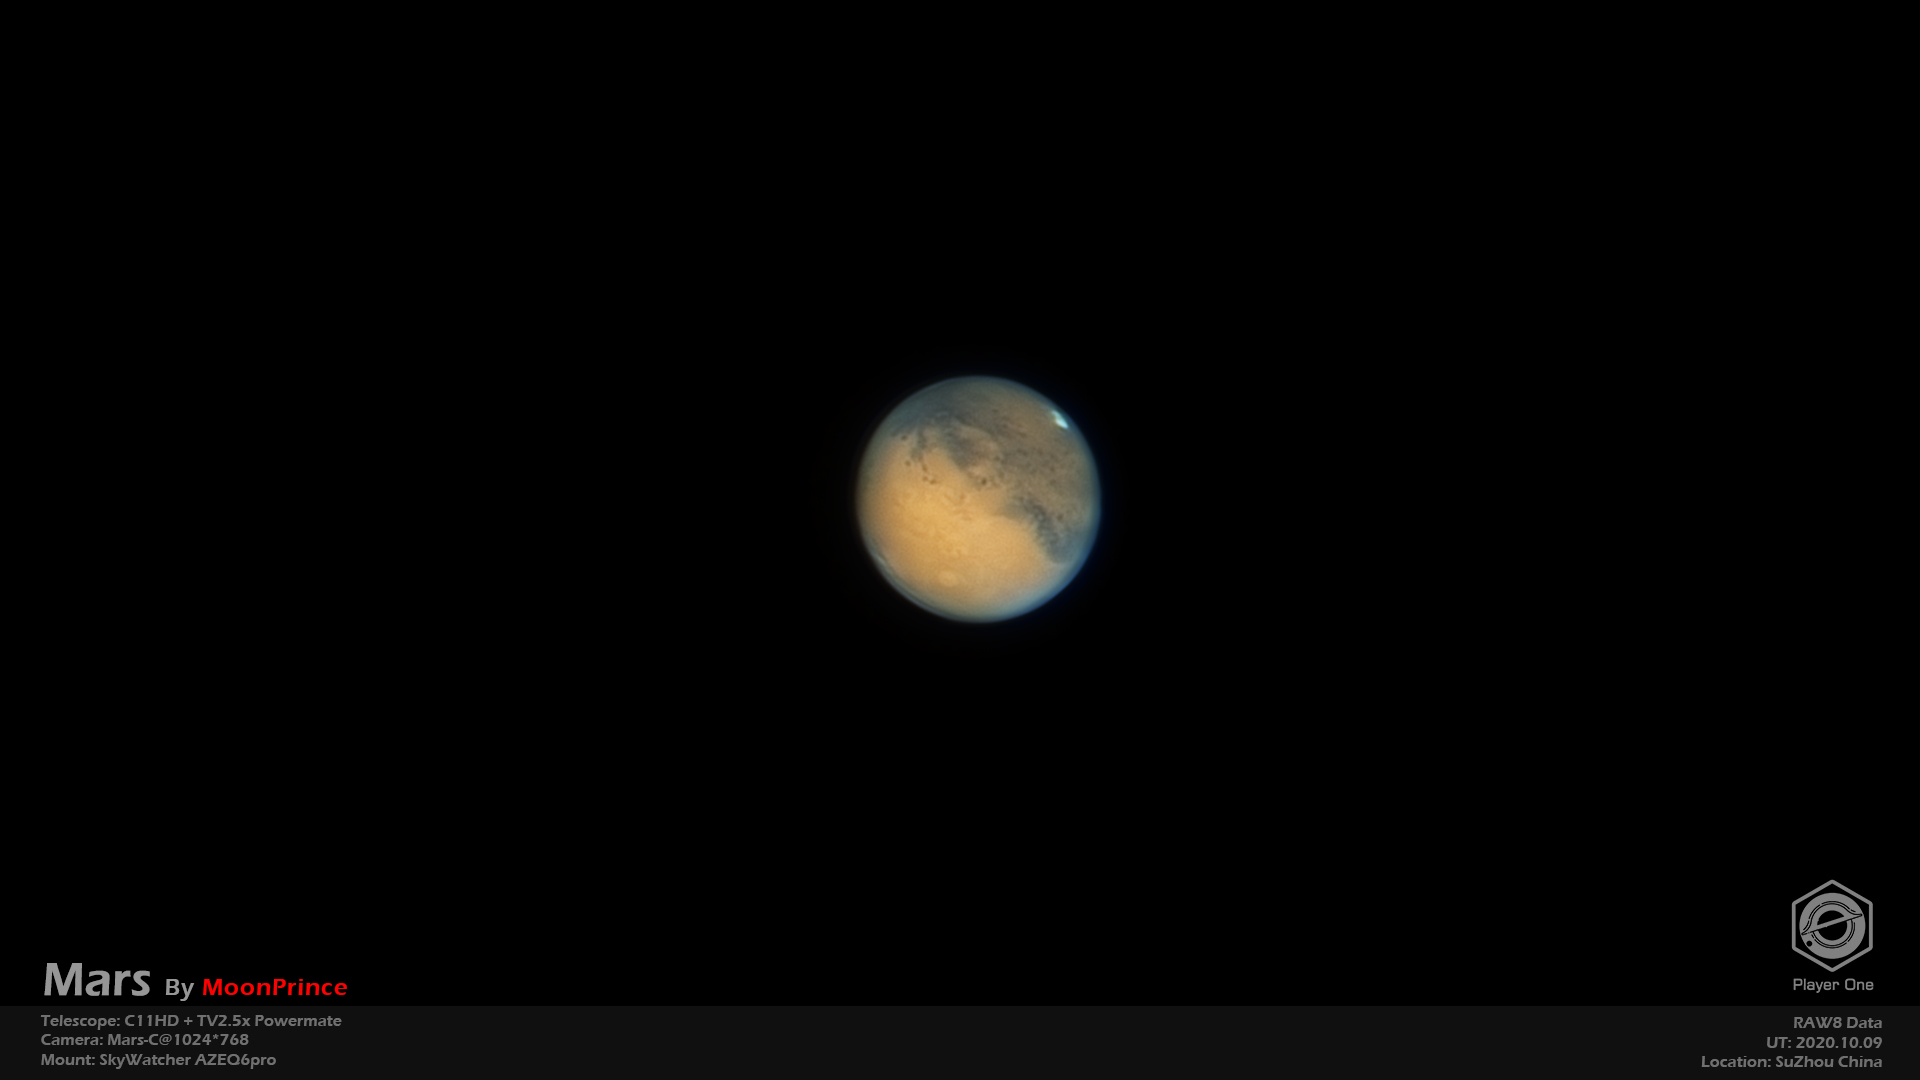
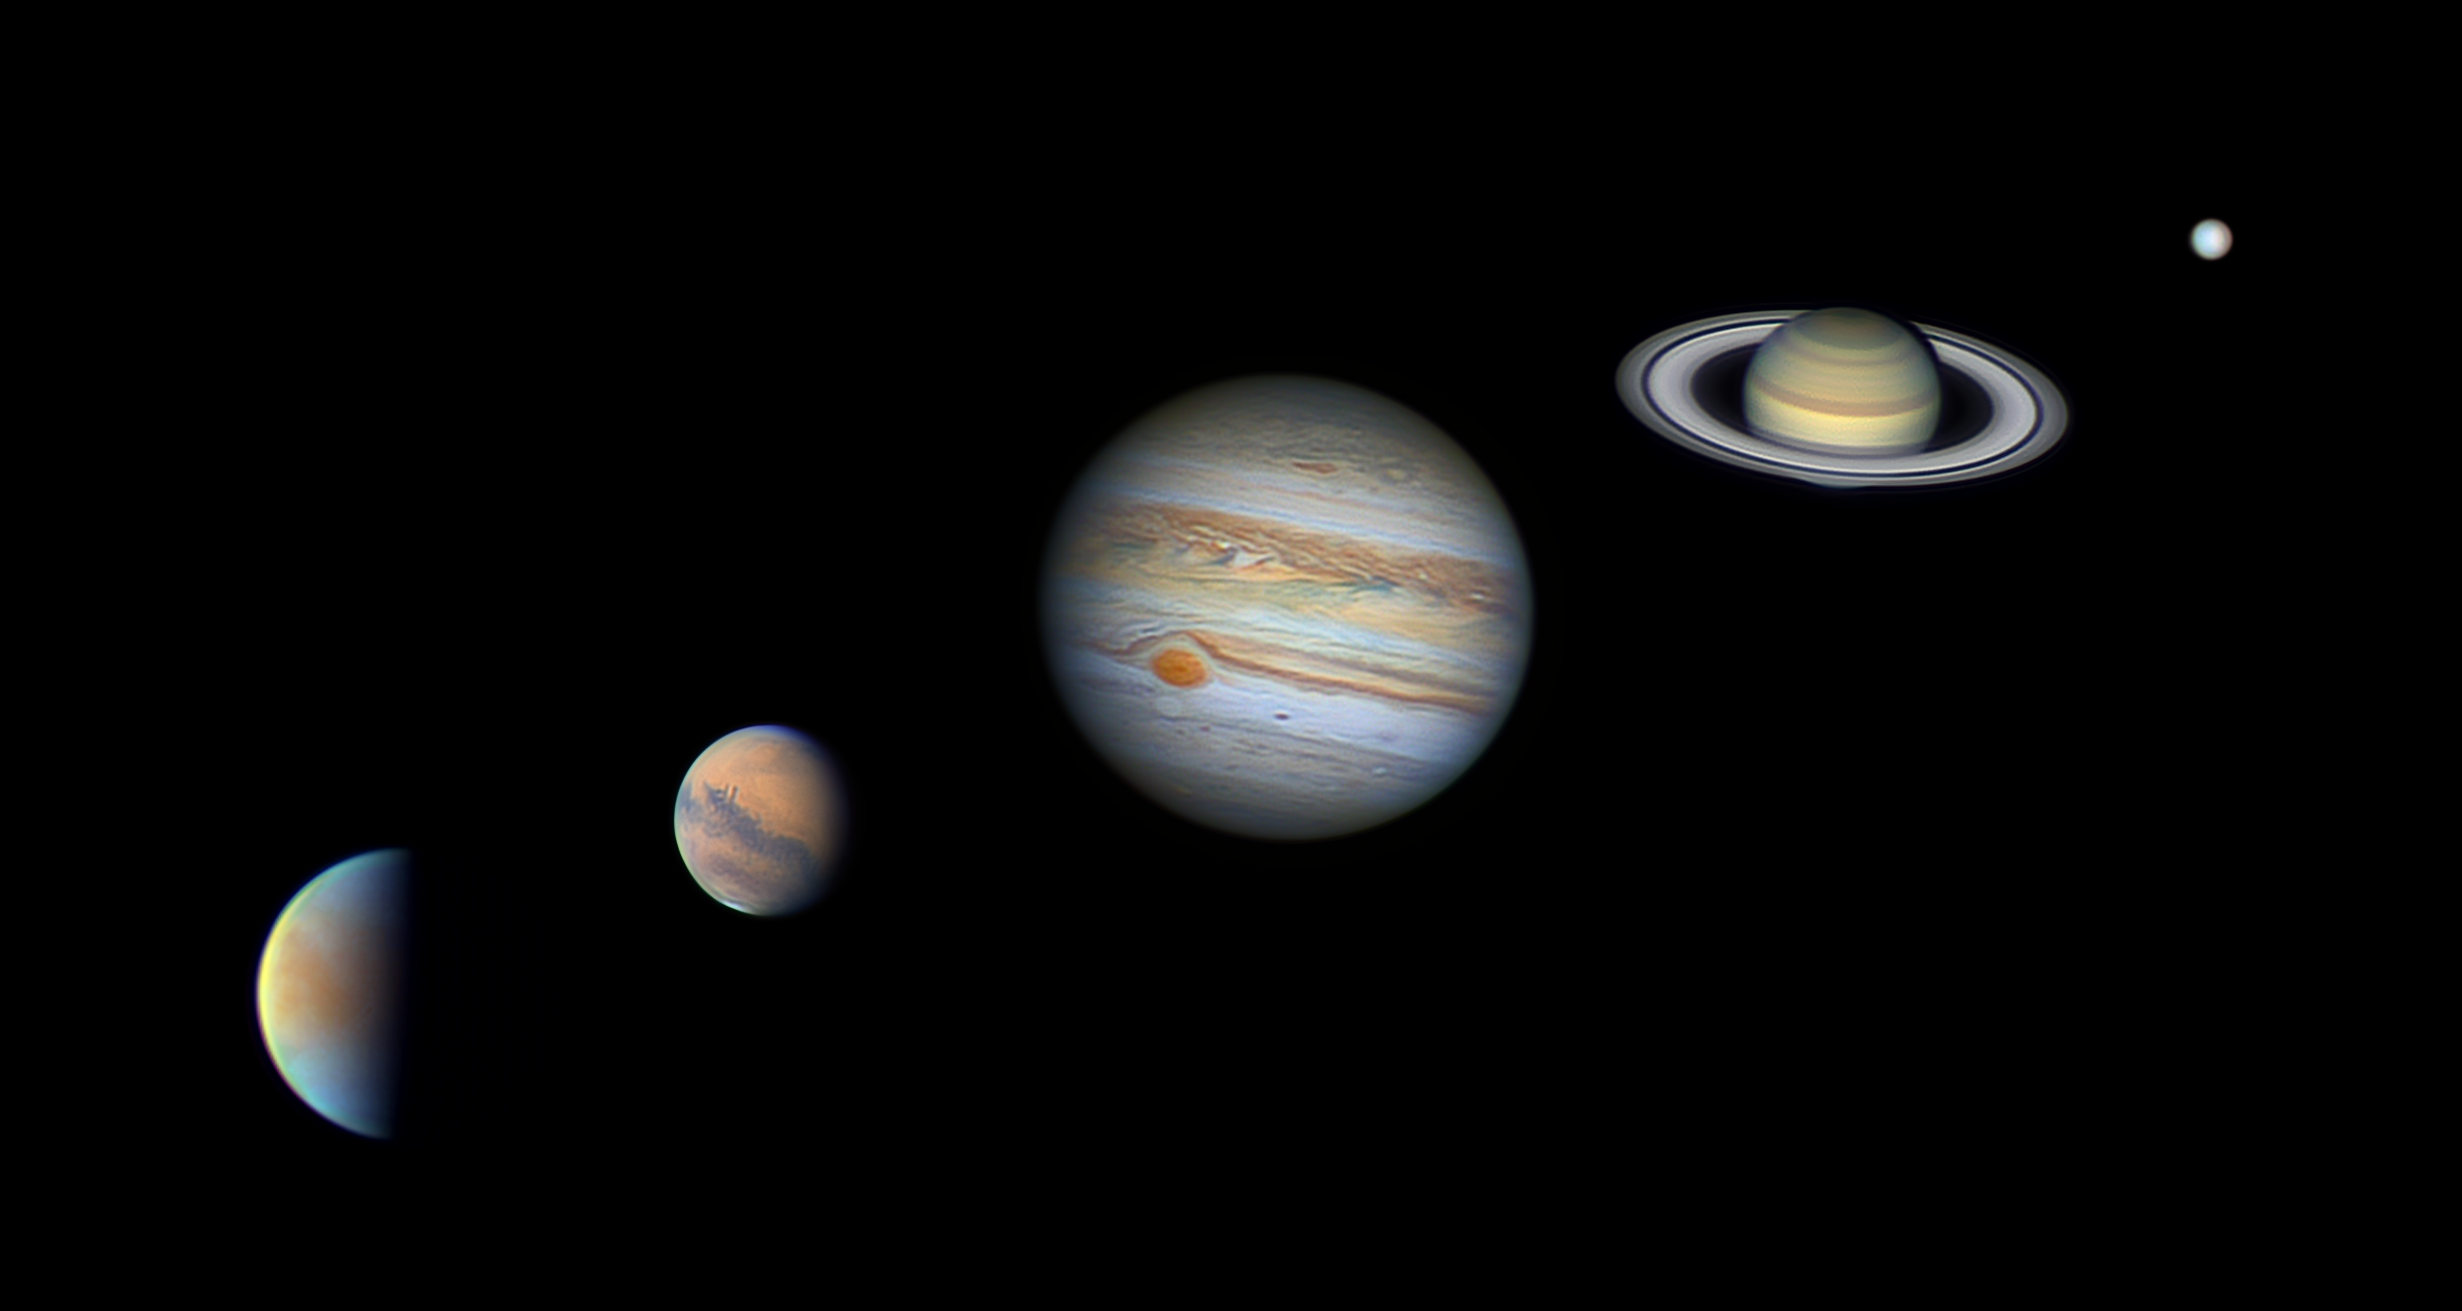
The charm of planetary imaging is that each of the major planets has different characteristics, the most well-known of which are the phase of Venus, the polar cap of Mars, the Great Red Spot of Jupiter and the rings of Saturn.We can get some details with some simple equipment, and the number of details we get is directly related to the resolution of the telescope. Of course, if you want to do it well, there are many factors to think about.
At the beginning, we dont want something complicated, let’s start in the simplest way.
Entry-level : Simplest way to get the first image of planets
What is the simplest equipment to take photos of a planet?
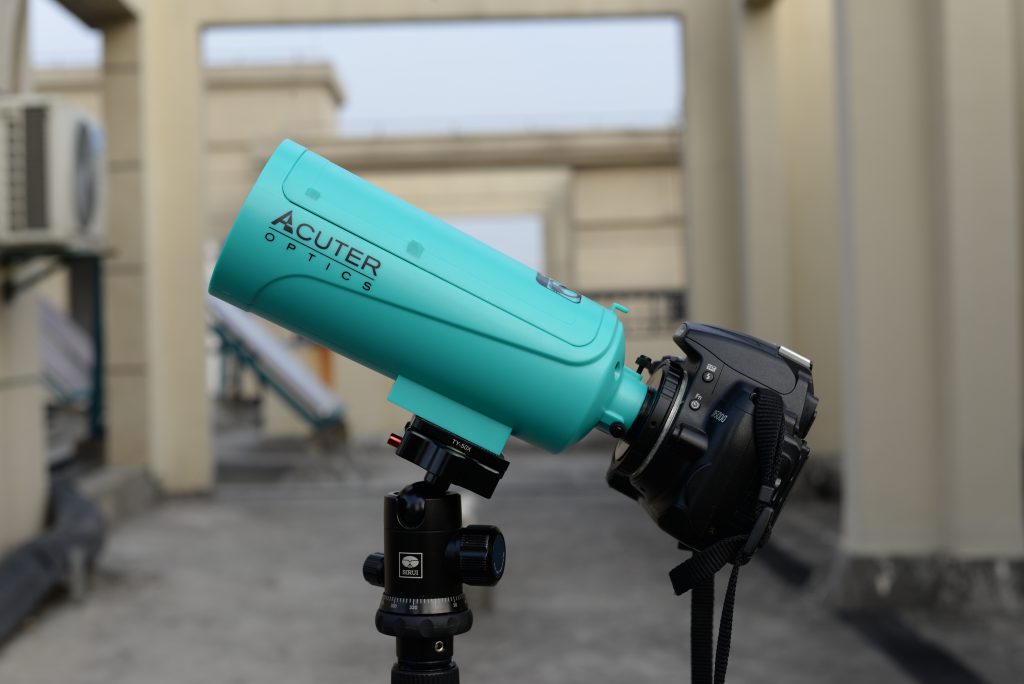
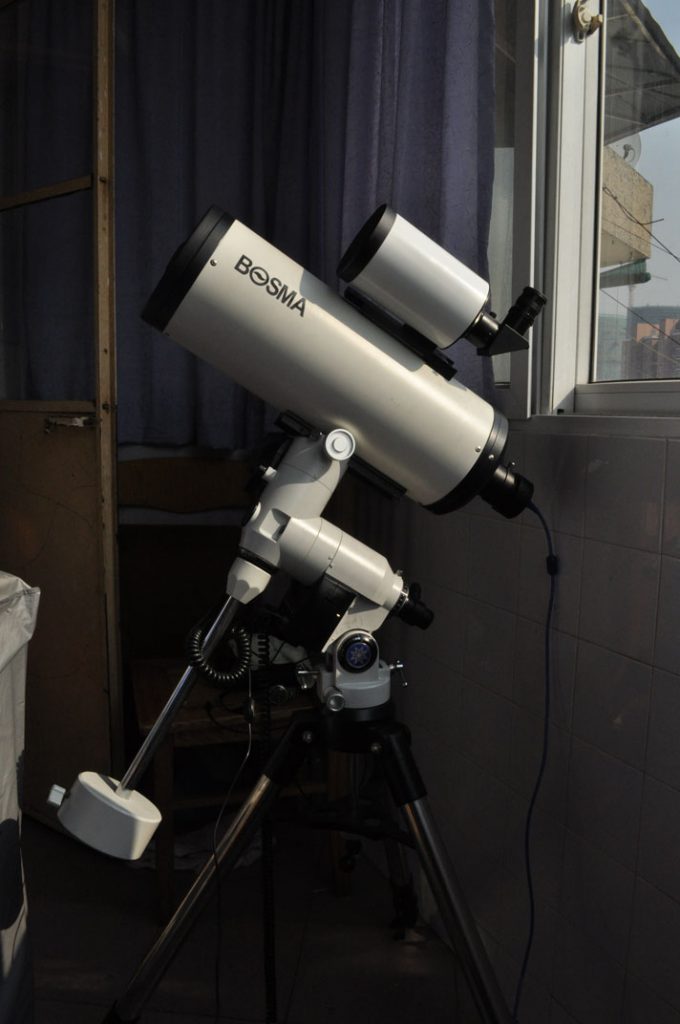
1. A telescope, no matter what its type, a refractor or reflector would be good;
2. An equator mount to carry your telescope, preferably have tracking function;
3. A camera(DSLR or Smartphone) for taking pictures.
With these three things, you can take photo straightly or behind the eyepiece. When you aimed on a planet, just focus on it, press the shutter, and a picture of the planet is done.
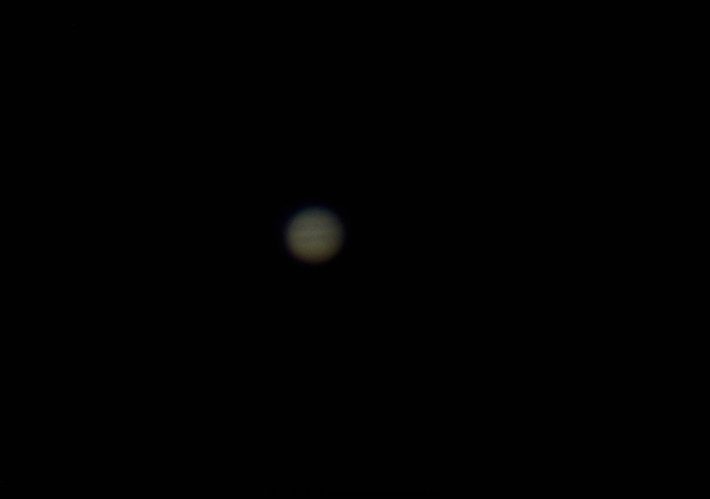
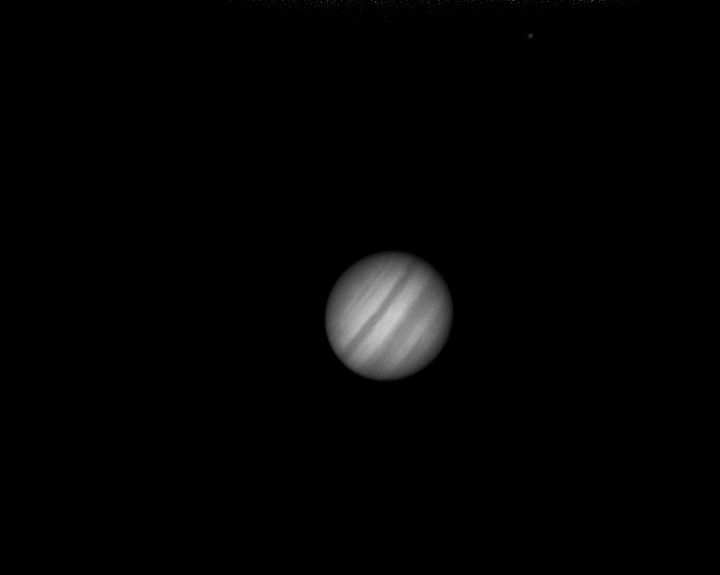
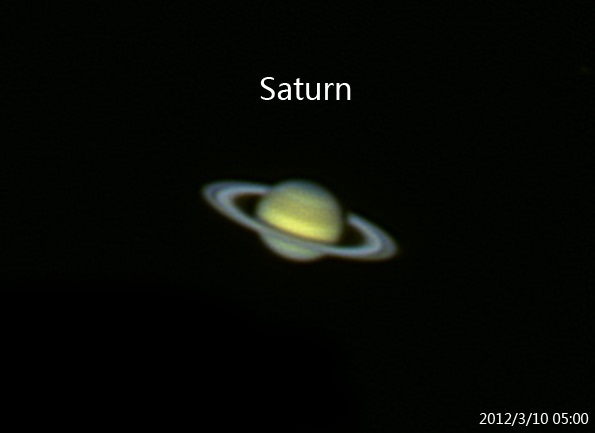
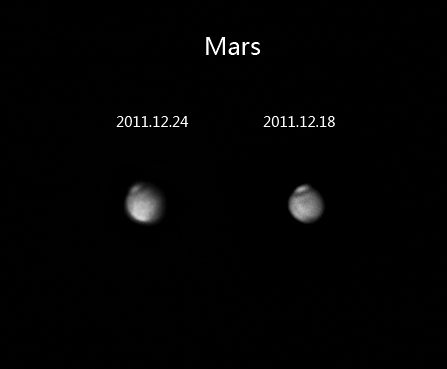
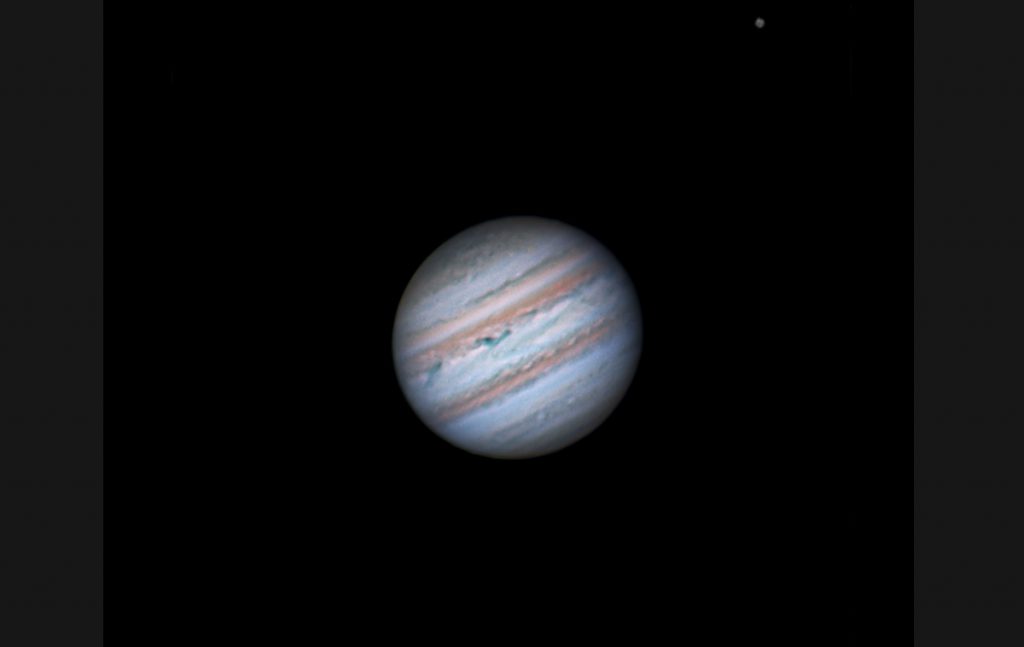
How easy it is to get started! By practicing in this simple way, learn to find more planets, learn to do precisely focusing, and find out the best exposure combination. You can take pictures of the phases of Venus, the polar caps of Mars, the cloud bands of Jupiter, and the rings of Saturn. There is an immediate sense of accomplishment. A single dot can capture the details. I WON !
Middle- level : Know about regular planetary imaging
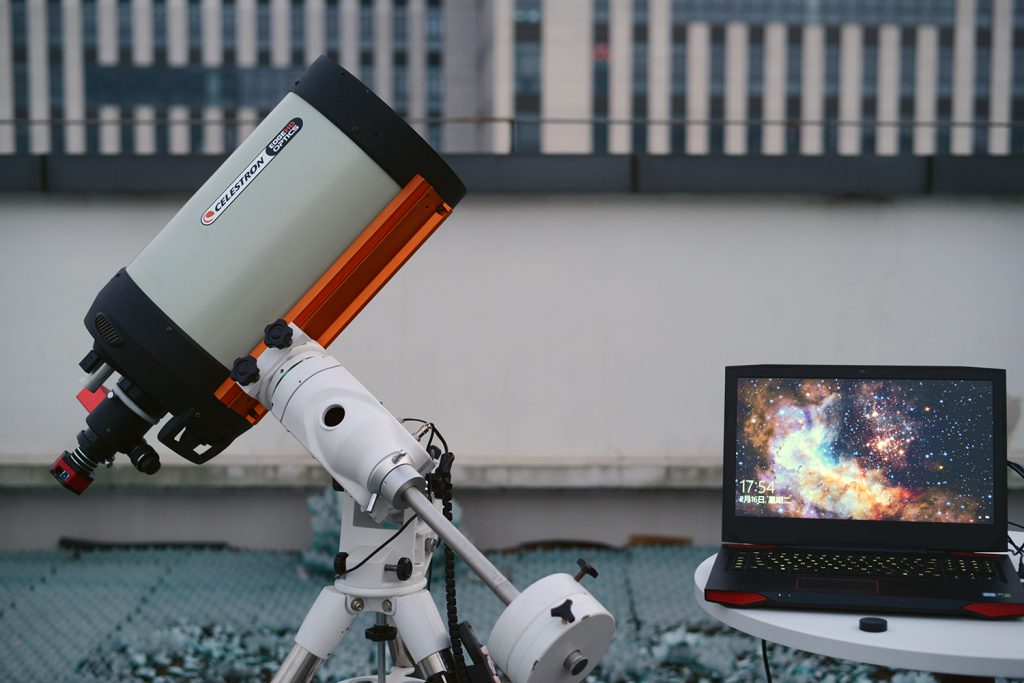
Learned to take picture of planet with a DSLR or smartphone, should be satisfied for a while. However, you might feel that this way of planetary imaging is too simple, the effect is not good enough too. Such as Jupiter’s Great Red Spot can not be seen, Cassini’s division of Saturn ring also can’t see on the photo. Those two things are fine with an 80mm diameter telescope, so what’s the problem? The imaging technique is too old. Except Hubble telescope, no one can take a well-detailed image of Jupiter in single shot. If you want more detail, you’ll need to handle present planetary imaging technique, “Frame stacking and sharpening”. What you need is a device that can record videos, preferably a professional planetary camera. A telescope of excellent optical quality. An equatorial mount of automatic tracking. A computer. And a barlow lens is also needed.
Choose an planetary camera must consider about four factors:
1. The higher the sensitivity, the better
2. Sensor format 1/3 “or 1/2” is good enough for planetary imaging.
3. The smaller the pixel size, the better
4. The higher the frame rate, the better
Before planetary cameras, the entry-level cameras are Logitech Pro4000, Philips 840K, SPC900NC, 700NC, was good for imaging years ago.
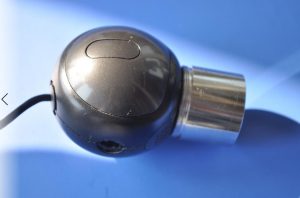
Philips SPC900NC is one very popular 10 years ago. SPC900NC uses a very good sensor on that time. The expensive DBK21 uses the same sensor, but the peripheral circuit of SPC900NC is not good as DBK21. Color performance of SPC900NC is the most outstanding in entry level.
The 1/2-inch format mono camera has better image quality than color camera, and it also has higher sensitivity. But the only disadvantage is that it has no color. In 2011, Micron MT9M001 mono sensor was widely used to manufacture planetary cameras.
Today, planetary camera are widely used for imaging and guiding. Such like our Mars-C/ Mars-M camera. With a camera, you’ll also need an electric tracking EQ-mount or AZ-mount that allows you to track object when you shoot them.
The preparatory work is not difficult. plugin a low magnification eyepiece and aim at the planet, move the target to the center of the field of view. When you finish focusing, remove eyepiece and plugin the camera quickly. After all that, you can use a laptop to control the camera and got preview in capture software( like Sharpcap) , and then record AVI video.
You need to keep the target in the view at all times and record an original video.
All that’s left is post-processing. Common software are autostakkert!3, AVISTACK2.0, Registax5 and 6, AstraImage, Photoshop, etc. Autostakkert!3 aka AS!3 is best for stacking. Registax6 is the easiest to handle if you are learning stacking and sharpening for the first time. It is not necessary to care too much about the differences of various software. These questions are left for more advanced gameplay.
The theoretical basis of Registax 5, which is the general basis of all stacking software, is to improve the SNR of an image by stacking frames. A concept of effective frame is proposed here. A frame with a certain detail has a certain signal-to-noise ratio, which is called an effective frame. Simply put, a valid frame is a frame in a video that looks sharp. The more effective frames are stacked, the higher the SNR is. The finer the image, the sharper the detail. Usually need to stack more than 500 frames to have a relatively high signal-to-noise ratio.
The post-processing of planetary imaging is roughly divided into three steps:
1. Alignment. Automatic align all the frames according to the position of planet.
2. Stack. Stack all effective frames(aligned) into a TIFF image.
3. Sharpening. Sharpen with wavelets method to show up the details of TIFF image.
There are a lot of details and tricks involved, but there is always the essence of change, and these three steps are the essence of planetary post-processing.
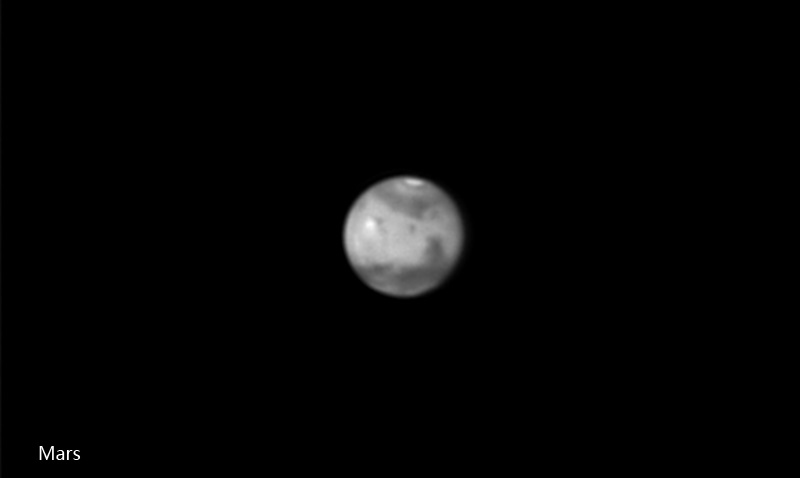
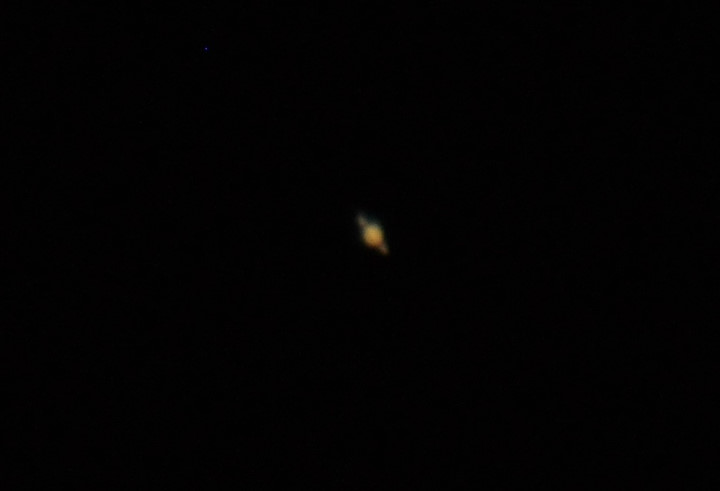
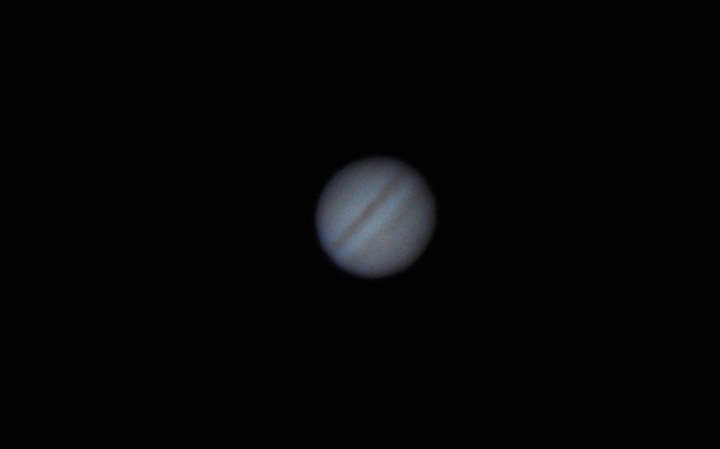
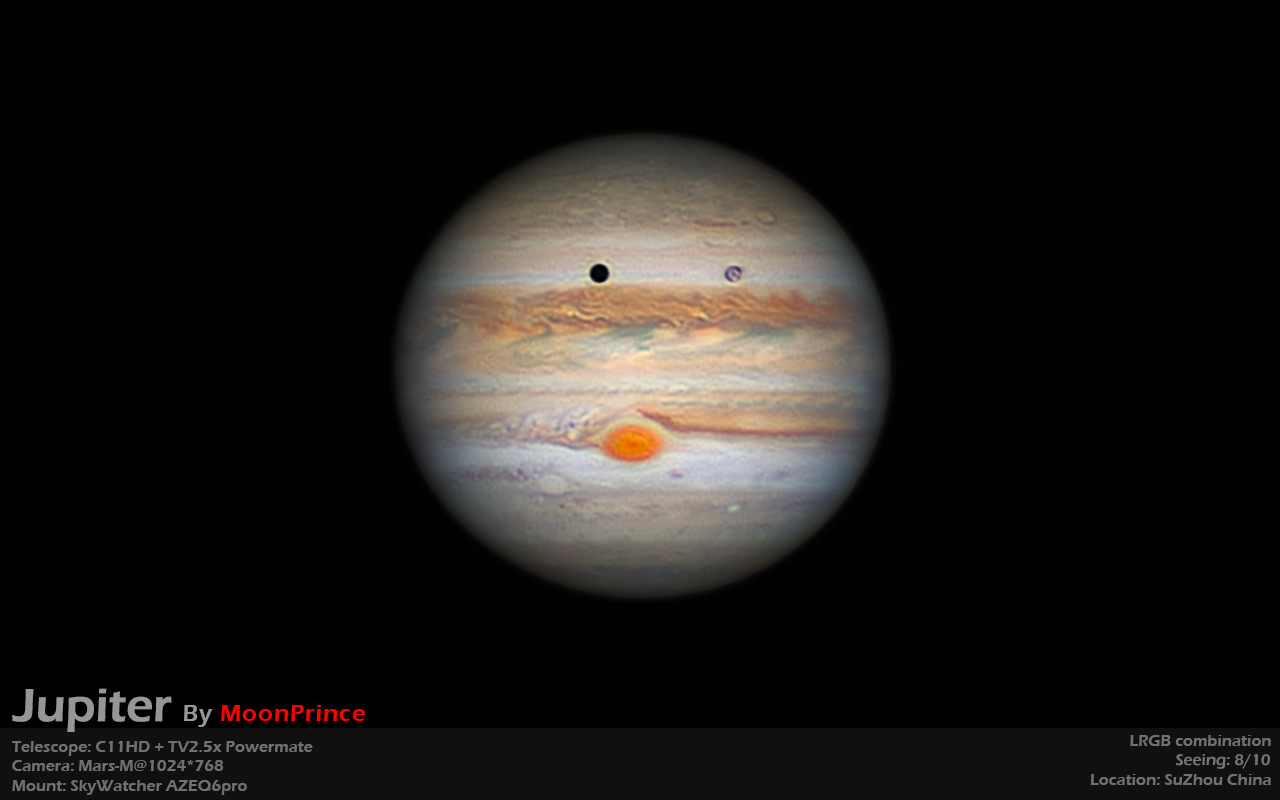
Use camera and stack technology to get the most out of your telescope. Even at 80EQ, images of Jupiter’s Great Red Spot, Saturn’s Cassini division, the polar caps of Mars and large landforms can be taken. And it looks fresh and natural. At this point, congratulations, you have truly entered the palace of planetary photography.
3. Advance-level : Improve your imaging result in various ways
To this level, you must have been unwilling to satisfy with images like I show you in middle level. You want to get details of Jupiter’s cloud bands and the Great Red and the Little Red and the White and so on. You also want to get details of Saturn’s body stripes and clear Cassini rings. You want to get more details of Mars’ landscapes and polar capes.You need to think about more things, and you need to master some better techniques.
The skills to master include:
1. Adjust the optical axis of the telescope. Both the Newtonian telescope and the Schmidt telescope require precise optical adjustment techniques to produce amazing results. The optical axis of your telescope should be able to do 600-800x magnification on a bright star, airy spot is perfect concentric circles.
2. Use of filters. Understand L/R/G/B filter, IR-pass filter, ND filter, UV-pass filter. If understand a little about narrowband filter would be better.
3. mono camera + filter wheel shooting skill.
4. Accurate focusing skill.
5. Familiar with capture software operation and functions.
Some professional equipments:
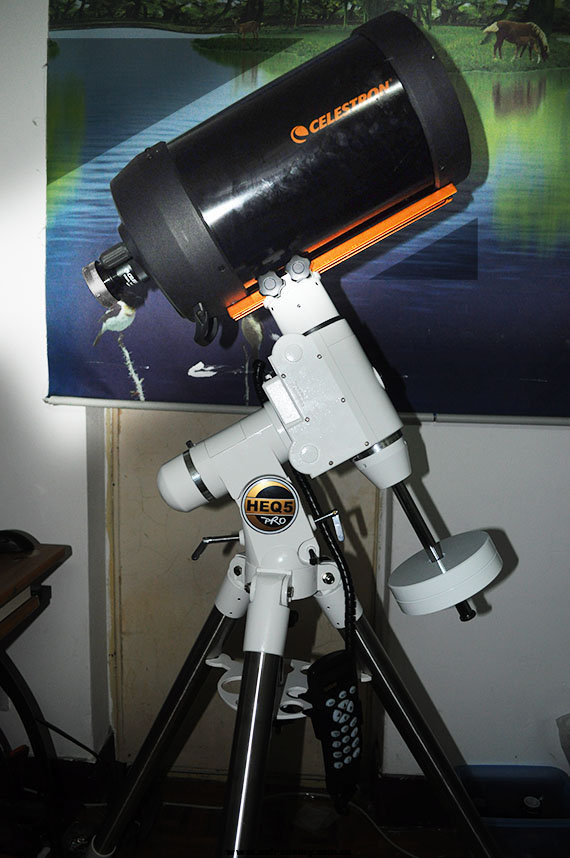
1. The largest aperture telescope you can afford, 150mm,200mm or larger. If PV of mirror is guaranteed, the resolution is proportional to the aperture.
2. Dual speed focuser is required too. Better to add an motor focuser.
2. The most stable mount you can buy, preferably HEQ5 or AZEQ6 GT. Tracking must be very smooth. Many people, including me, have very bad experiences with the instable tracking.
3. The best camera you can afford. Such as Mars-M( IMX462), Mars-C(IMX290), Neptune-C II(IMX464) these are the planet’s tool.
4. LRGB/IR filter and filter wheel is required for the mono camera.
5. Better barlow lens, such as ES, Orion, Meade, Tele Vue, etc.
6. Atmospheric Dispersion Corrector, to reduce the effect of atmospheric dispersion.

Some factors to consider:
1. Atmosphere seeing condition and transparency, which are crucial for planetary photography.
2. Reduce reflection of imaging train
3. Smooth and stable in tracking.
3. Exposure and gain combination.
4. Time limit. Planets like Jupiter, rotate very fast, we need record LRGB channel and make it quick as we can.
As you can see, the more advanced the planetary imaging becomes, the more complicated and the more factors to consider.
If these requirements are met and the video is recorded successfully, then the battle is half over.
The following step into the post-processing stage, the need to master the technology are:
1. Autostakker!3 for stacking and Registax6 for sharpening.
2. Maxim DL LRGB combination, turn mono image to color.
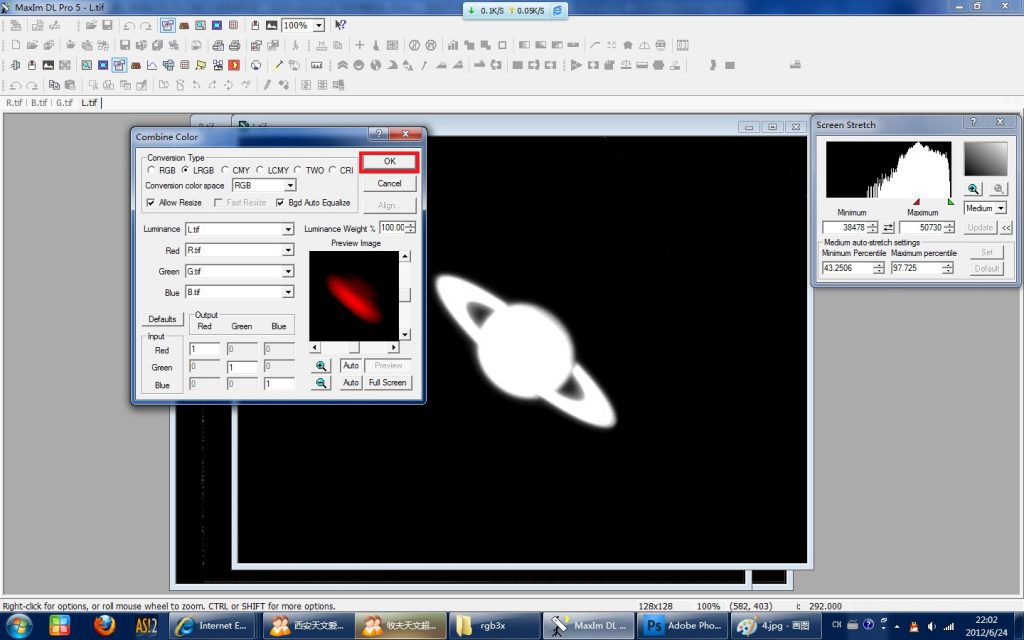
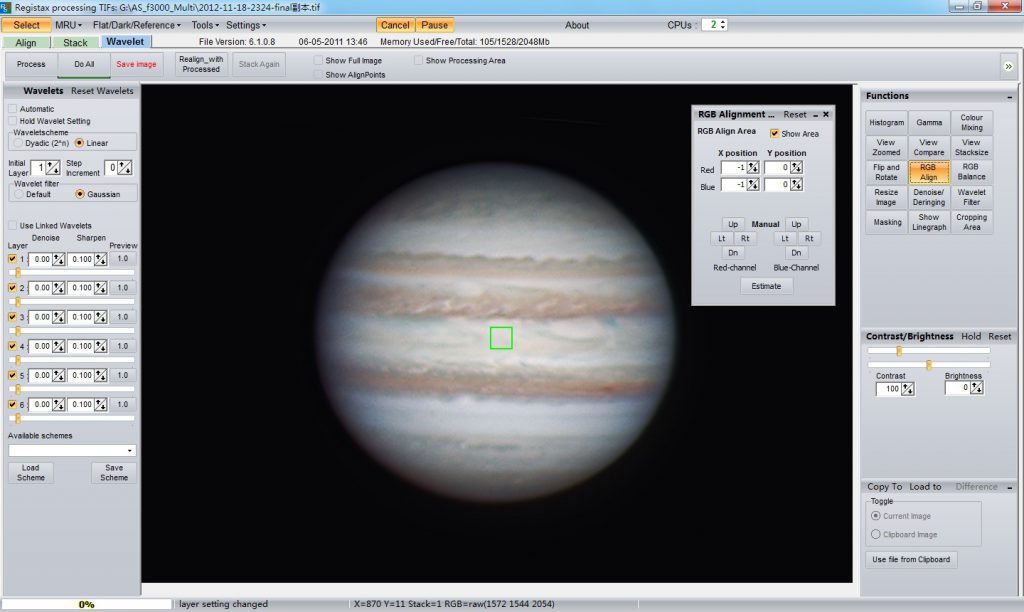
3. Registax6’s RGB Alignment, to reduce chromatic aberration caused by the atmosphere.
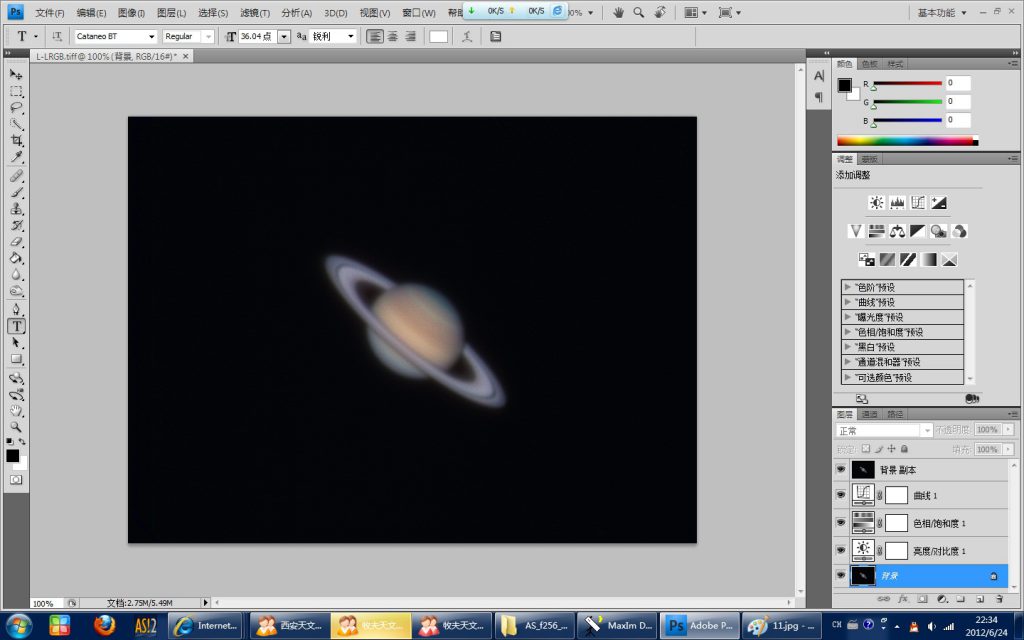
4. Some techniques of Photoshop such like Curve, Histrogram transformation, color balance, etc. Make the image more visual tension.
4. Master-level : Do something impressive
If the previous advanced chapters have covered all the traditional theories you know, then you may ask, what else is there to write about in this chapter? Because the previous technology has hit a bottleneck. In this article, we intend to make planetary imaging a little more precise and complex. If you could process a image of Jupiter in 10 minutes in the advanced article, now it’s going to take you three hours. Let’s see what we can do in three hours.
Consider this question first:
As mentioned above, the more effective frames you add, the clearer the detail will be. But in the case of Jupiter, to avoid the effects of rotation, the total shot time was only two minutes. So at most, RGB shoot 1000 frames per channel and stack 500 frames. So this is definitely not enough frames. Is there a way to stack more frames, say 3,000 frames per channel, while avoiding the planetary rotation that causes misalignment?
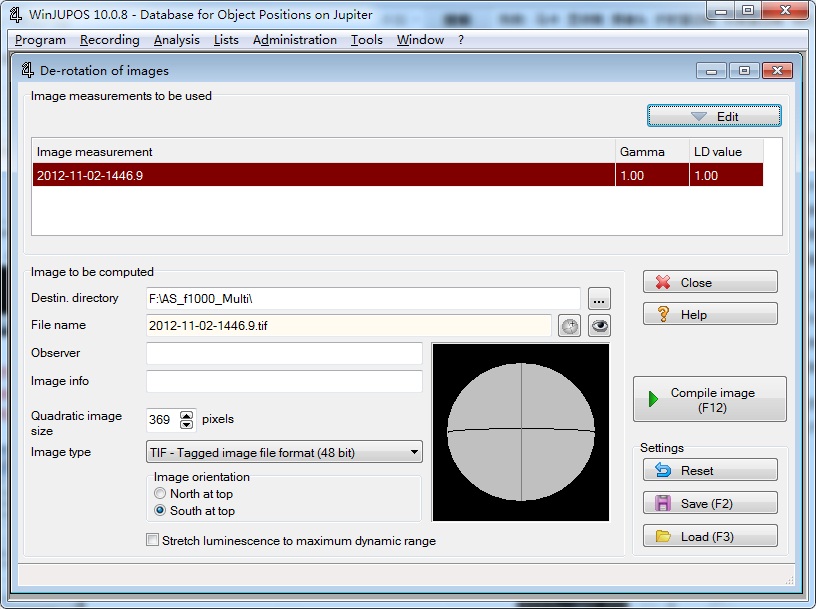
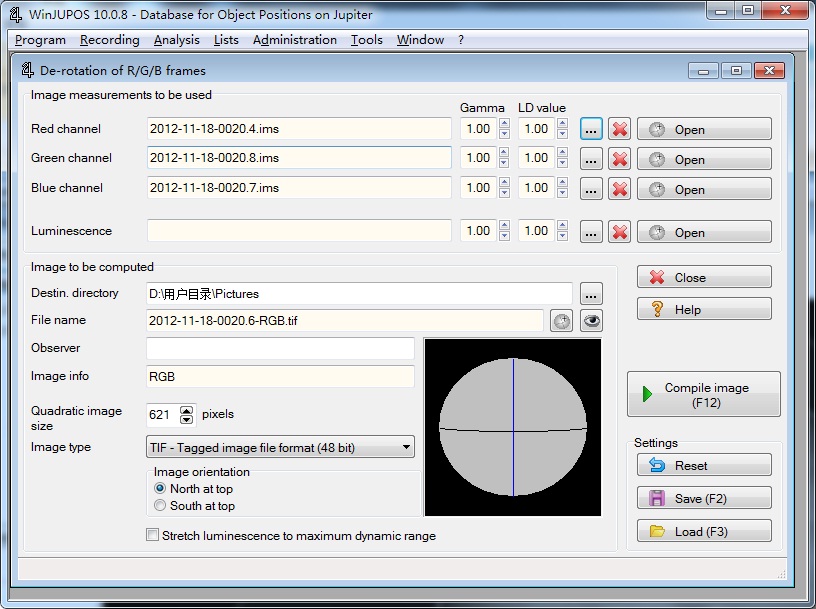
With the continuous development of software technology, it is now possible to do things that were not possible before. The software that fixes the effects of spin is called WinJupos.
What can Winjupos do?There are many functions, but only a small part will be mentioned here.
1. Analyze the meridian and the polar of the planet automatically. If the automatic calculation is not good, you can adjust it manually.
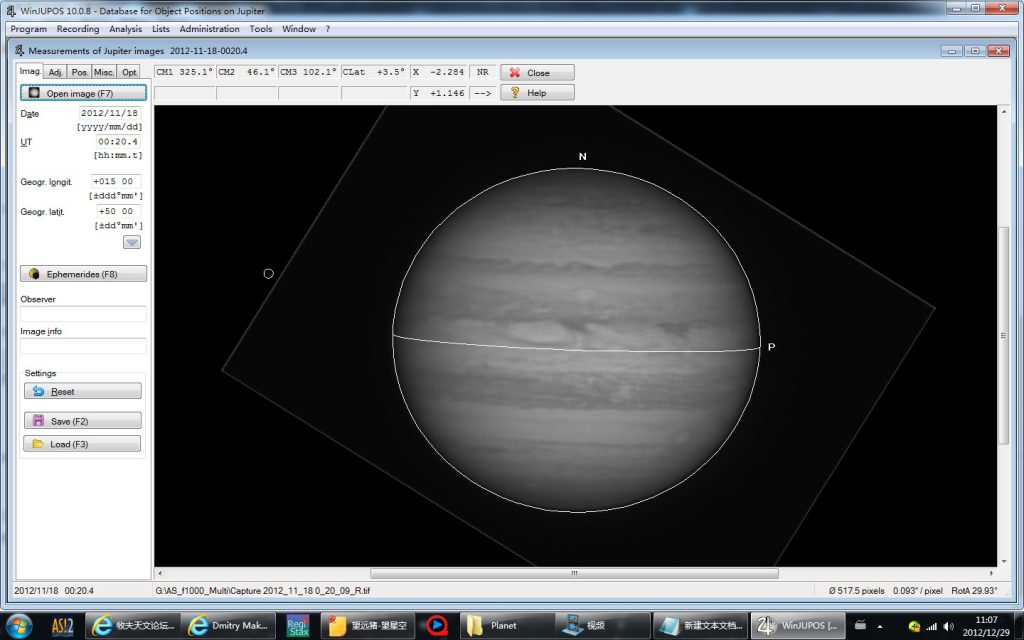
2. For a stacked image, you can correct for the blur caused by the rotation of the planets in this window.
3. For LRGB combination, the rotation influence of the LRGB channels can be corrected. But sometimes this process takes a long time, and sometimes without a satellite as a reference, it takes repeated attempts to correct the time parameters to align as good as possible.
4. For the original video, you can correct the rotation of the planet in a few minutes of video.
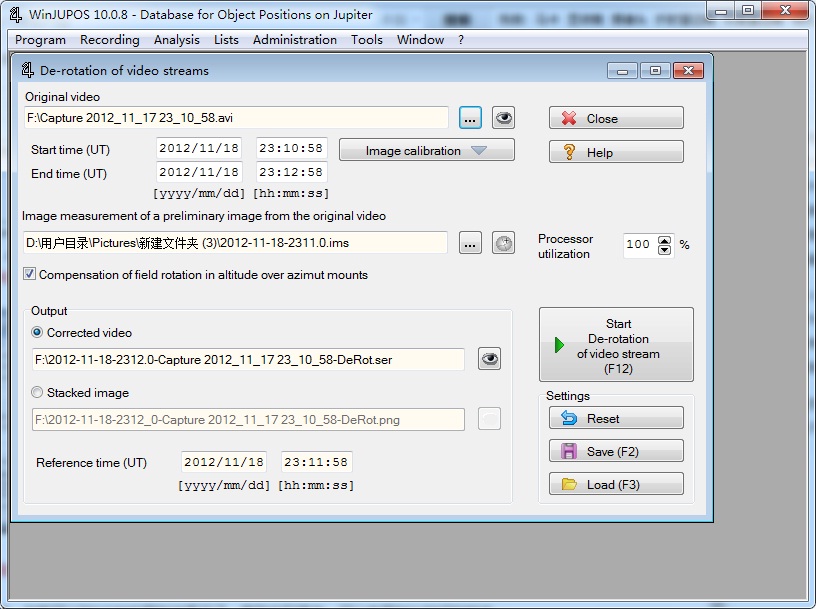
With these features, you can say goodbye to the 2-minute limit.
In practice, there are two better ways to beat.
- Shoot 2 minutes of each LRGB channel, or RGB channel, about 3600 frames per channel, or more.
So each channel itself does not need to consider the planet rotation, only need to calibrate LRGB rotation to use Winjupos. - Shoot the L channel for 4 minutes, 5000-10000 frames, RGB for 1 minute and 1000-2000 frames for each.
Then you need to make a rotation correction for the L channel raw video, and then make another rotation correction in LRGB combination.
It’s hard to say whether the results of different methods are good or bad.
It seems to me that the latter method is more suitable for widespread use in situations where the seeing is not very good.
Of course, there are many other functions that need to be studied in detail.
Except skills, so what else needs to be strengthened?
- The equipment.
Resolution depend on diameter of prime mirror, so upgrade to bigger telescope always get surprise. - Check weather and seeing.
I’m afraid we’ll have to pay more attention to the weather and the clouds.
We also have to look at the high and low pressure zones, high altitude stream, and something like that. - I’m afraid we’ll have to go out more, practice more, get more experiences.
- Beyond that is perseverance.
Even a master, he is not every day to be able to shoot a perfect planet image, but also in the constant shooting in pursuit of the best shooting window.
whoah this blog is excellent i really like studying your articles.
Keep up the great work! You understand, a lot of persons are searching round for this information, you can help them greatly.
Highly energetic post, I liked that a lot. Will there be a part 2?
Yes, will write more 😀
Highly energetic article, I liked that bit. Will there be a part 2?
Yes, will be soon. 🙂